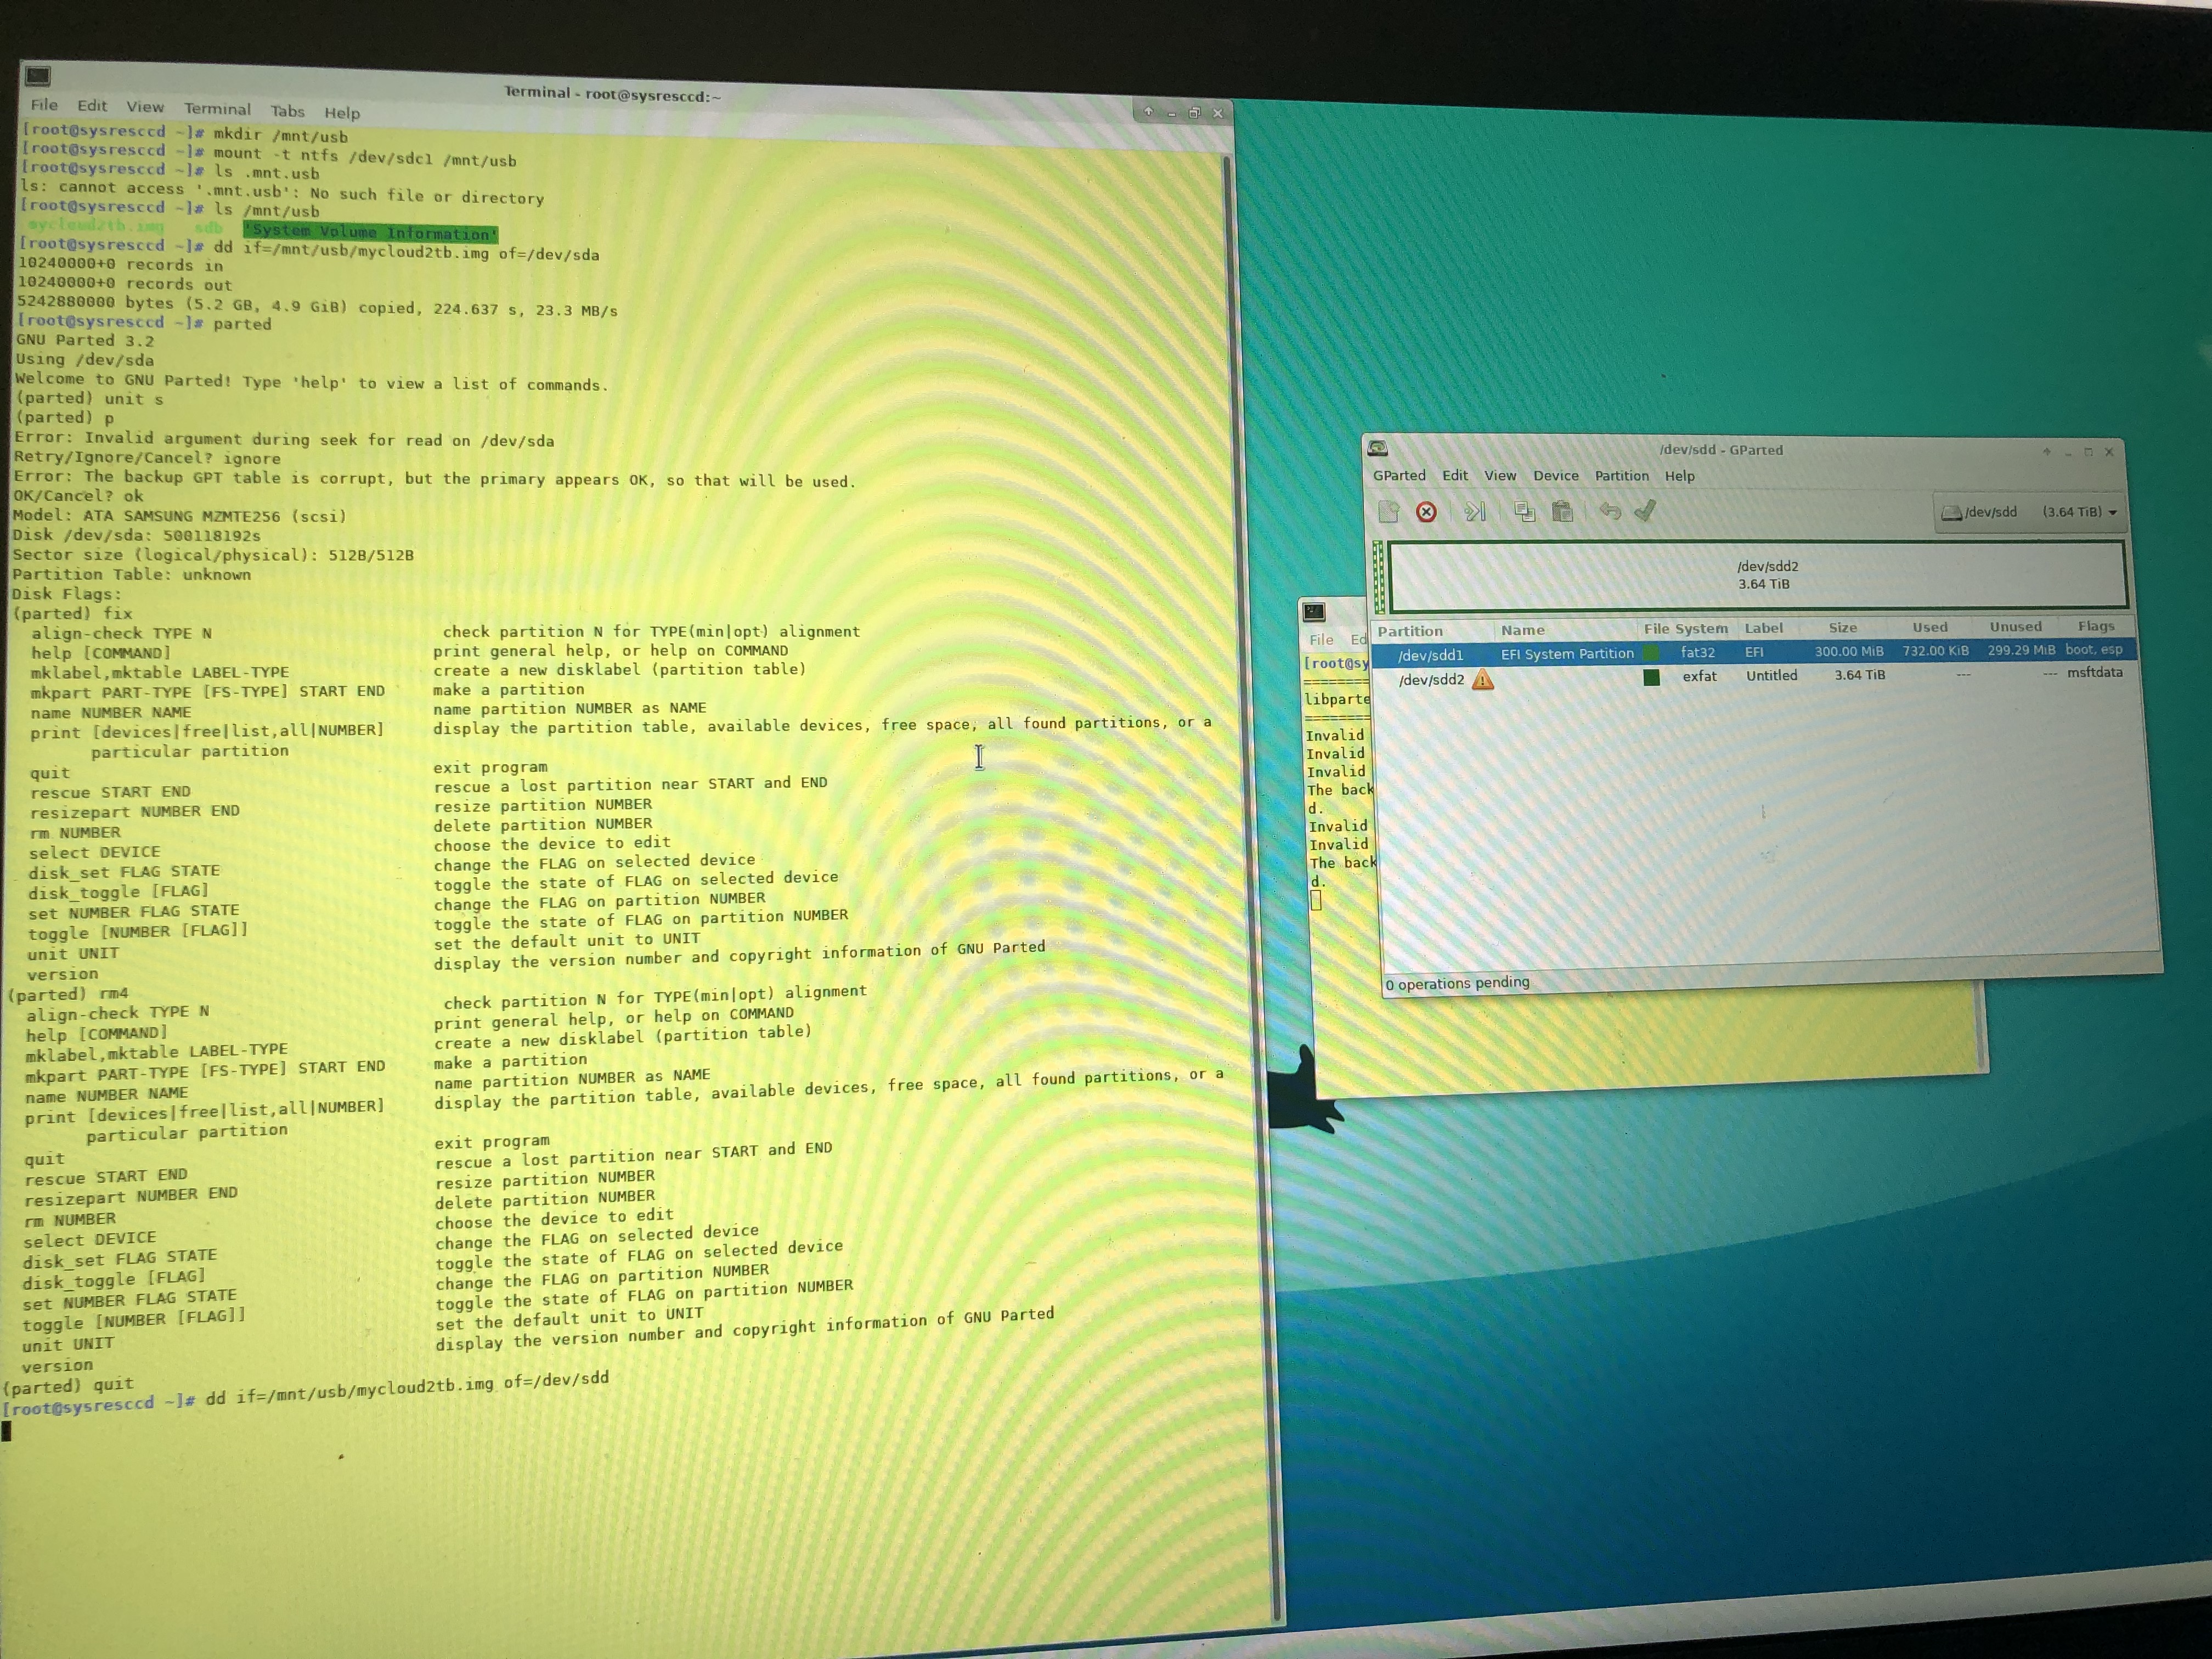
You’re trying to run parted without specifying which device, so it is defaulting to /dev/sda.
You don’t want it to do that; that’s your computer’s OS disk…
Tell it what device to use instead:
parted /dev/sdd
i did use /dev/sdd on the first picture above this post and i still got an error
dd if=/mnt/usb/mycloud2tb.img of=/dev/sdd is what i typed for step 8
You weren’t specific for which of the ‘some errors’ you wanted help with. I commented on your use of parted, not the dd image copy.
I don’t know what’s causing the dd error, but I note that it only seems to have affected one record. Are you sure the source file is okay?
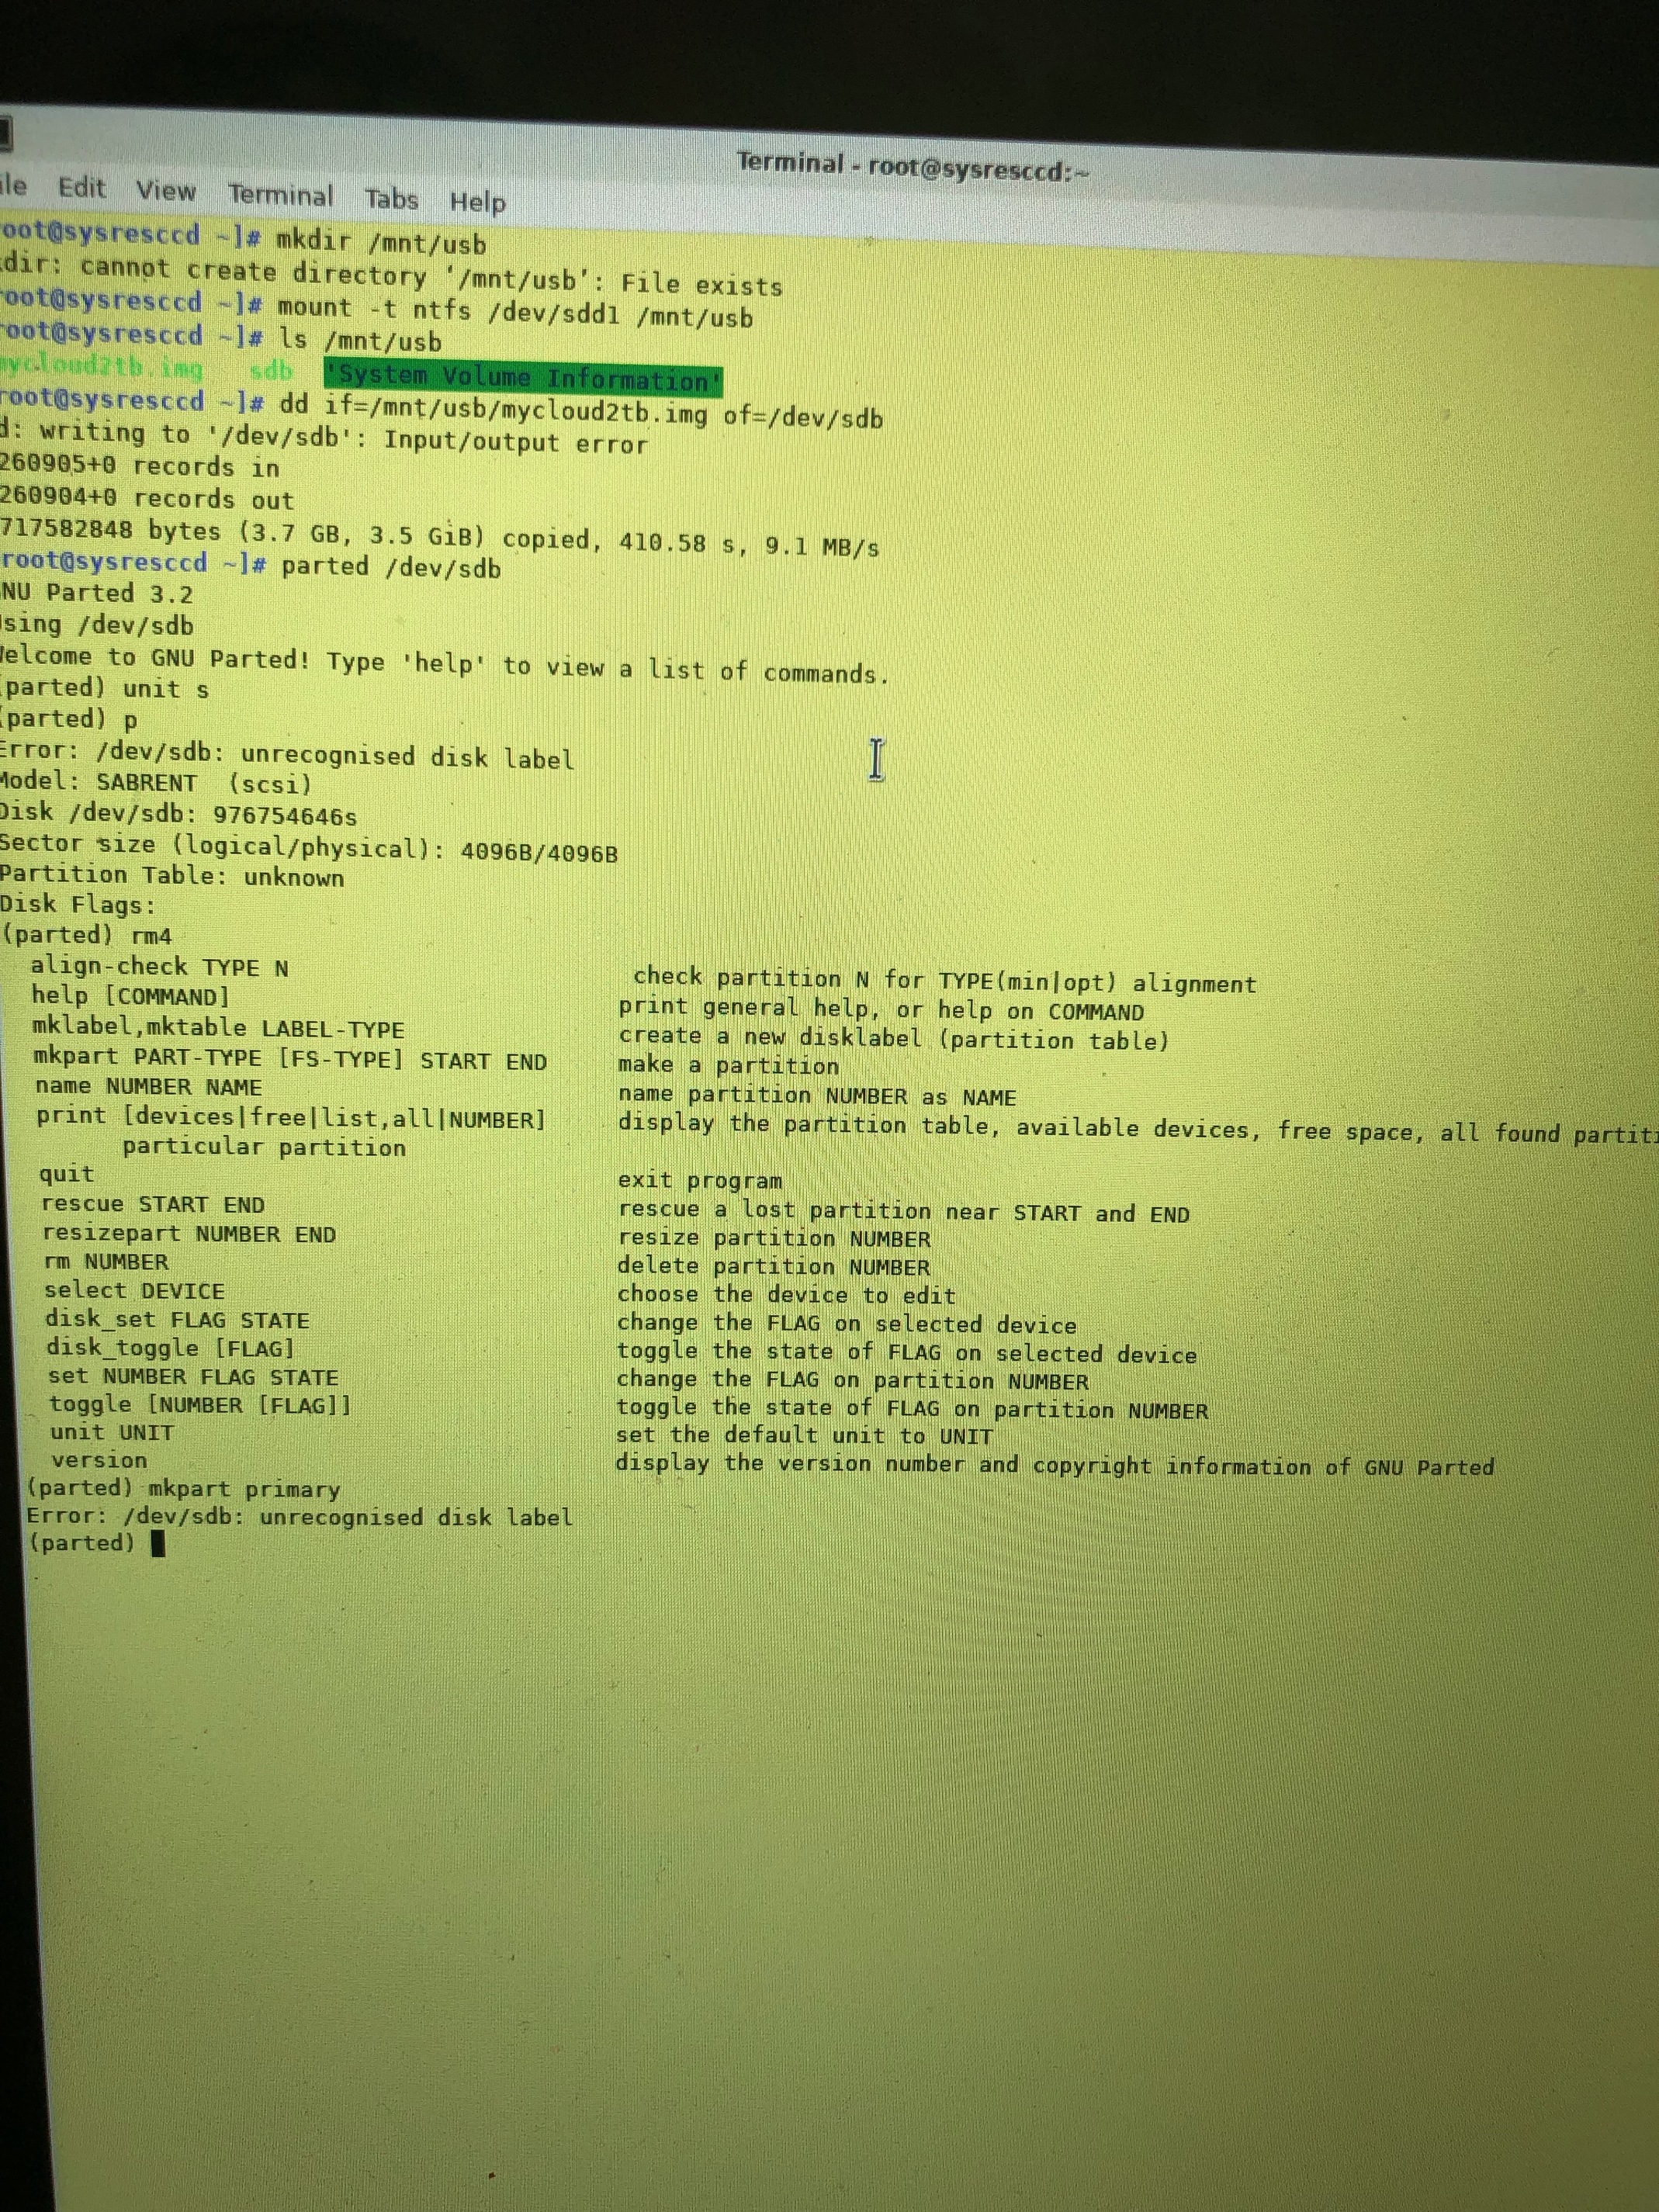

Your photo shows you tried to use /dev/sdb
I could be wrong as I’ve not used mycloud2tb.img file but normally one writes the image file direct to a specific partition. For example: dd if=kernel.img of=/dev/sdd5
On a first gen My Cloud I’ve used the following directions by user Fox_Exe several times with success: https://fox-exe.ru/WDMyCloud/WDMyCloud-Gen1/Replace%20HDD%20-%20English.txt
The IMG file used in those directions can be found here: https://fox-exe.ru/WDMyCloud/WDMyCloud-Gen1/Backups/
do you know if there is a video tutorial on this method?
No idea if there is a video of this method as I don’t use this method when unbricking a first gen. I use Fox_exe’s method which I linked to in my prior post. In fact just unbricked a blank 1GB drive yesterday using Fox_exe’s first gen directions.
Couple of suggestions. Try partitioning and formatting the drive then test the drive for errors before following the steps in the initial post.
One thing I am finding though is if the superblocks and or GPT information (used for Linux drives and partitions) get corrupted you can run into possible problems trying to push IMG files to the drive or it’s partition. One may need to check the Linux formatted disk for errors and try to correct them, possibly using gdisk to correct GTP or MBR errors.
i meant is there a video on fox.exe method?

Not that I know of off hand but apparently there is at least one (see link below) that is close to the current Fox_exe directions. There does appear to be some videos on unbricking a My Cloud on Youtube.
https://www.youtube.com/results?search_query=unbrick+my+cloud
There appears to be a video on the method used in the initial post of this current thread:
https://www.youtube.com/watch?v=1vXe1o3us84
The following video link is close to the current Fox_exe directions:
As the information (parted help) in the screen capture you posted indicates you use rm to remove a partition not the word “remove”. Example: rm 1

yea i got past that the tables aren’t respoding though i will try to do some more digging
apt-get update && apt-get install mdadm parted
where can i get this file
You run those commands in a Linux terminal window. The Fox_exe directions assume one is using a Linux boot disc/USB flash drive or is running some form of Linux. There are numerious free versions/flavors of Linux. Ubuntu is one such popular version that one can download and burn to a DVD or to a USB Flash drive: https://www.ubuntu.com/download/desktop
The bottom of the Ubuntu link has directions on how to create the boot media. One would then boot their computer using that boot media. One one is at the Linux desktop one would then open a Linux terminal window and begin issuing the various commands detailed in the directions.
you have been a great help i got to step 8 but i hit a wall do you know what i am supposed to do here ?

After entering: mdadm --create /dev/md0 --level=1 --metadata=0.9 --raid-devices=2 /dev/sdb1 /dev/sdb2 one would then enter: watch cat /proc/mdstat which will show one the progress/status of the mdadm command. Once it it’s 100% one would then select the CTRL + c keys to close the status and return to the command prompt where you can continue with the remaining steps.
Couple of additional comments. You can choose to use one of the two following files to extract.
Original_v03.04.01-230.tar.gz: https://fox-exe.ru/WDMyCloud/WDMyCloud-Gen1/Backups/original_v03.04.01-230.tar.gz
Original_v03.04.01-230.tar.gz: https://fox-exe.ru/WDMyCloud/WDMyCloud-Gen1/Backups/original_v04.01.02-417.tar.gz
If you run into trouble with the kernel.img in original_v04.01.02-417 being too large for the sdx5 partition when you issue the dd command. Delete the files extracted from the original_v04.01.02-417 file and extract/use the files from original_v03.04.01-230.
Once you reconnect the My Cloud board to the hard drive and boot/power it on, if it doesn’t boot (after a long wait) to a blue front LED, it might boot to a red front LED. If it does boot to a red front LED try accessing the My Cloud Dashboard (http://wdmycloud or http://wdmycloud.local) and access the Settings page. Then select Quick Restore from the Utilities menu. That should fix the fail to mount content partition error that causes the red front LED.
Once you have a blue front LED one can then proceed to upgrade to the latest My Cloud firmware. If one used original_v03.04.01-230 they can upgrade to v04.01.02-417 before upgrading to the very latest My Cloud firmware. Not sure if one can go from the older v3 firmware direct to the very latest firmware, but one could always try rather than doing the interim step of going from v3.x to v04.01.02-417.
http://community.wd.com/t/wd-my-cloud-v3-x-v4-x-and-v2-x-firmware-versions-download-links/148533
04.01.02-417 (12/17/2014) Firmware: http://download.wdc.com/nas/sq-040102-417-20141211.deb.zip
Latest My Cloud v4.x firmware: http://download.wdc.com/nas/sq-040500-334-20190221.deb
Use data partition as download folder:
mount -t ext4 /dev/sdb4 /mnt
cd /mnt
do you know what is meant by this process