We have two mac’s in our home. A macbook Pro and a imac.
i bought the my cloud beacause I wanted both machines to backup timemachine files automatically.
Does any one know how to set this up or is it not possible
We have two mac’s in our home. A macbook Pro and a imac.
i bought the my cloud beacause I wanted both machines to backup timemachine files automatically.
Does any one know how to set this up or is it not possible
See the My Cloud User Manual (https://support.wdc.com/product.aspx?ID=904) which explains how to use the various features/functions of the device. Including, in Chapter 4 Backing Up and Retrieving Files which has a section on how to setup Apple’s Time Machine.
Thank you Bennor for your suggeston but you are missing the point. I want to save two completely different bacups from two different machines. The instructions only show one copy, where do I put the other?
Not missing the point at all. Just follow the directions. When each Time Machine backup is setup it will create (or is supposed to create) a separate “sparsebundle” for each Mac computer in the Time Machine folder on the My Cloud.
Try it and if you get an error let us know what the exact error message is.
Hi Bennor, I am sorry if i upset you as this was my main reason for purcasing the thing. I see your point and I will try your suggestion. Meantime I spoke to WD support and this was their reply. “As anticipated by phone, unfortunately MyCloud gives you only one folder called “Time Machine Back Up”, so , to be able to make a difference between the back up from your first Mac and the second one, the only thing you can do is to rename the folders, or the back up projects, in different ways to distinguish them.”
That sounds like what you are suggesting but I will try again and let you know how I get on. Many thanks, Chris
Not sure why you would assume I’m “upset” based on my previous reply(s). This is a user to user support forum. I and most others are simply end users like yourself who came here for one reason or another and decided to stay and help others.
As previously indicated when one setups two or more Mac Time Machine backups to the My Cloud each backup will have it’s own “sparsebundle” file/folder containing the Mac Time Machine backup for that Mac. The file/folder name is typically based on the name of the Mac user/computer.
Here is an example of what it looks like with two separate Mac computers running a Time Machine backup to the single bay My Cloud.
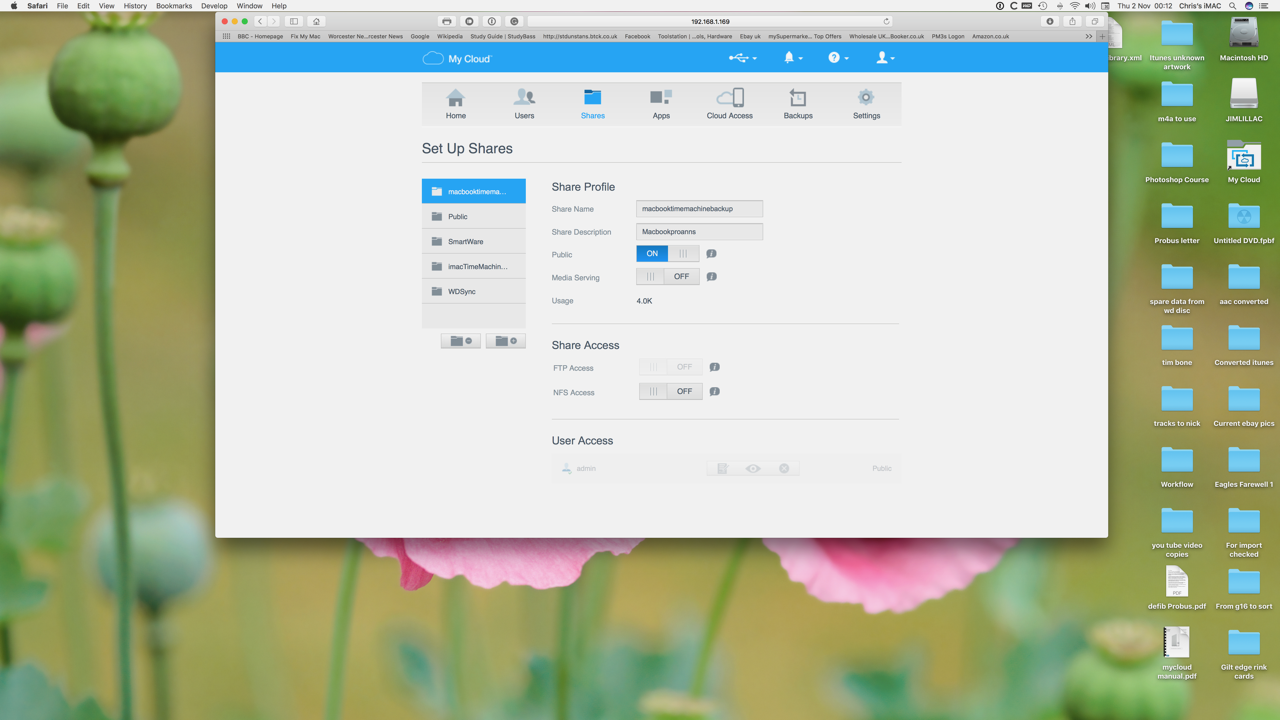
Hi, thanks for your pic, I have enclosed what mine looks like. Not the same. Are you using the allocated time machine backup location or are you creating two shares labelled accordingly. I am not sure what I have, I am thinking of aborting the whole thing and starting again from scratch.
Chris
There is no need to create additional Shares or subfolders to store the Time Machine backup. On each Mac setup Time Machine to backup to the default Time Machine Share on the My Cloud. Time Machine will create folder based on the Mac User/computer name within the My Cloud Time Machine Share.
My screen capture above (taken from WD My Cloud Desktop software) is similar to what one would see if they used Mac Finder to view the contents of the Time Machine Share after the Mac’s have successfully run Time Machine backups.
It doesn’t look right because the Mycloud.com web portal typically does not show the My Cloud Time Machine and Smartware directories. Look at the My Cloud Shares using Mac Finder to access the local My Cloud.
I can’t see the time machine share. I went to settings and chose public as Time Machine share was not shown, and yes it is turned on in settings.
Chris
Did you by chance rename the default Time Machine Share or delete that Share?
On my first gen v4.x single bay My Cloud device there was a default Share called TimeMachineBackup.
When using the Apple Time Machine program on the Mac what My Cloud Shares are listed when you configure the Time Machine program to access the My Cloud? Try using one of the Shares that is displayed (if any).
Edit to add: Not sure about the v2.x My Cloud but on the first gen v4.x My Cloud there is a “Configure…” option, when Time Machine backup is enabled through the My Cloud Dashboard, that can be selected where one can select the Share used on the My Cloud. Here is an example of what that Time Machine Settings looks like on my first gen v4.x My Cloud.
I Think you have found my problem, I may have renamed the time machine share. Does this mean that it might be better to do a factory re-set and start again from scratch. Meantime both machines have backups being done as public shares, and have not finished yet. Does it matter where they are!!
If you decide to reset the device you may have to select the option Quick Restore in the Dashboard > Settings > Utilities page that wipes the drive and its contents. Don’t think a 40 second reset will change the Share names back to default.
If you reset the drive and Share names it will probably break the location that Time Machine is using causing the Time Machine backup to fail. Not sure if you can change an existing Time Machine backup or move an existing Time Machine backup to another location. I assume an internet search will yield more information on that aspect of migrating Time Machine to another location.
I realize this is an old thread, but still valuable.
I have the exact situation. 2 different Macs, and what I did after setting time machine up for the first one, I added a ‘share’, i.e. a new folder, which I called TimeMachineSL (for the Mac running Snow Leopard). I first made sure that folder was visible from the SL Mac, and then told TimeMachine to choose this folder for back ups. Both Macs are now set to back up the the MyCloud drive.
For those new to this - the backup will not look like the backup to a local drive, it appears as a sparsebundle. After the initial backup, I was able to mount the sparsebundle. This image shows the mounted sparsebudle from the first mac, and the 2 original backups.
To add to this - when adding a 2nd or 3rd TimeMachine backup the new folder needs to be ‘blessed’ (or something like that) so that TM recognizes it as a valid TM choice. So,
and choose the folder.
Once I did that, I was able to choose additional folders for TM backups.
I encountered this same issue and found a solution with help from this, and an additional pearl, but some background first.
You can add more than one Time Machine backup to the one that exists as a standard “Share”. I can’t recall what it was named out of the box because I changed it, something like “Timemachinebackup” or some such.
If you select this from computer #1 as a backup and do nothing, it will expand out of control to take over your hard disks because Time Machine is designed to keep old versions, deleted files etc. until the disk is utterly FULL. This is fine with a 3 TB external USB drive perhaps, but not with a 20 TB RAID 1 NAS. As the previous responder points out, you can go to Settings…General…Mac Backups and click the little “configure >>” in blue. There you will find a slider that can be used to limit the maximum capacity for your Time Machine. I personally set mine to 50% more than the computer to be backed up to allow plenty of room for recovery of older files which is the whole point of Time Machine.
You CAN add the same, one and only My Cloud Time Machine Share as a destination disk for the Time Machine on a second computer, but the trouble is, I do not see that there’s a way to independently adjust how much space is allocated to each computer.
Therefore, create a new share with a different name. According to JoeTaxpayer above, you need to “bless” it with the “Settings…General…Mac Backups…configure >>” process which I did, I bumped the maximum capacity allocation to the left a bit to perhaps trigger the My Cloud to recognize it as a valid Time Machine destination. I don’t know that you need to go bless it in this way to make it appear as a selection on your second computer, I don’t know if you have to bump the slider to make this happen, but it did work and I won’t be playing around with it to see what the minimum requirement is!
But I can tell you this. If you rename the existing TimeMachine share to something else, create the second share with a different name as above, and then go to start the Time Machine on computer #1 it will only see the second share you created. You have to actually start the backup in process for computer #1 before creating the second share, and then, and only then, will the second computer see that share.
After you are done creating the first backups, don’t forget to go back and change the allocation of data to what you want if you didn’t before, lest the Time Machine hog all space on the NAS.
Whew!
Could have been better designed, if you ask me.
I’m reviving this old thread, because I just got a WD My Cloud EX that I want to use to backup four Macs.
So yes, the design of the interface is not suited to this need: it allows you to assign ONE quota at a time for ONE TimeMachineBackup directory and, yes, it’s completely silly because the Mac on which the large files change most often will prevent the other Macs from keeping their backup history. Also, yes, the “quota” assigned to the TimeMachineBackup directory seems to be randomly taken into account by Macs that threaten to occupy the entire NAS with their backups, preventing users from using it to share their work.
My solution: ignore the TimeMachine directory quota. Don’t try to create another TimeMachineBackup directory because using the first or second one seems like a hack. Simply :
Thanks yserra.
I have set up my MCEx2Ultra the way you suggest. BUT . . .
How does the TM application ‘know’ which BU-user to work through? The TM preferences window only allows you to point the TM app at the “TimeMachineBackups” Share.