YOU USE THIS GUIDE AT YOUR OWN RISK
INSTALLING THIS WILL VOID YOUR WARRANTY
You may want to take a look at my guide on how to reinstall a fresh OS if you run into issues
What is Deluge?
Deluge is a lightweight, Free Software , cross-platform BitTorrent client.
- Full Encryption
- WebUI
- Plugin System
- Much more…
Issues
Need to get the Block List working (This may be working now)
With that being said let’s get on with the guide
Run this command to remove the claims the MBL puts on some system files
rm -f /var/lib/dpkg/info/wd-nas.*
We are gonna install from the wheezy, experimental and non-free repos so edit your sources.list and comment out all repos except for deb wheezy main, deb experimental main and deb wheezy main contrib non-free by putting a # at the beginning of any other repos
nano /etc/apt/sources.list
You want it to look like this
#deb http://ftp.us.debian.org/debian/ squeeze maindeb http://ftp.us.debian.org/debian/ wheezy main#deb-src http://ftp.us.debian.org/debian/ wheezy main#deb http://ftp.us.debian.org/debian/ sid maindeb http://ftp.us.debian.org/debian/ experimental maindeb http://ftp.us.debian.org/debian/ wheezy main contrib non-free
Once the sources.list is edited
Hit control and o
Hit enter
Hit control and x
This will save the updated file
Now update your sources and install these packages
apt-get update
apt-get install python2.7 python-libtorrent python-openssl python-twisted-core python-twisted-web deluge-common deluge-web deluged unrar
Now let’s update deluged and the webui from 1.3.3 to 1.3.5
aptitude -t experimental install deluged deluge-web
You will get the following message, just type Yes when prompted
Untrusted packages could compromise your system's security.
You should only proceed with the installation if you are certain that
this is what you want to do.

  deluge-common deluge-web deluged

Do you want to ignore this warning and proceed anyway?
To continue, enter "Yes"; to abort, enter "No": Yes
Now let’s create a deluge daemon file
nano /etc/default/deluge-daemon
Paste the following info into the empty nano window (right mouse click)
# Configuration for /etc/init.d/deluge-daemon

# The init.d script will only run if this variable non-empty.
DELUGED_USER="root"

# Should we run at startup?
RUN_AT_STARTUP="YES"
Hit control and o
Hit enter
Hit control and x
This will save the updated file
Now let’s create the auto-start script
nano /etc/init.d/deluge-daemon
Paste the following code into the empty nano windows (right mouse click)
#!/bin/sh
### BEGIN INIT INFO
# Provides: deluge-daemon
# Required-Start: $local_fs $remote_fs
# Required-Stop: $local_fs $remote_fs
# Should-Start: $network
# Should-Stop: $network
# Default-Start: 2 3 4 5
# Default-Stop: 0 1 6
# Short-Description: Daemonized version of deluge and webui.
# Description: Starts the deluge daemon with the user specified in
# /etc/default/deluge-daemon.
### END INIT INFO

# Author: Adolfo R. Brandes

PATH=/usr/local/sbin:/usr/local/bin:/sbin:/bin:/usr/sbin:/usr/bin
DESC="Deluge Daemon"
NAME1="deluged"
NAME2="deluge"
DAEMON1=/usr/bin/deluged
DAEMON1_ARGS="-d" # Consult `man deluged` for more options
DAEMON2=/usr/bin/deluge-web
DAEMON2_ARGS="" # Consult `man deluge-web` for more options
PIDFILE1=/var/run/$NAME1.pid
PIDFILE2=/var/run/$NAME2.pid
UMASK=022 # Change this to 0 if running deluged as its own user
PKGNAME=deluge-daemon
SCRIPTNAME=/etc/init.d/$PKGNAME

# Exit if the package is not installed
[-x "$DAEMON1" -a -x "$DAEMON2"] || exit 0

# Read configuration variable file if it is present
[-r /etc/default/$PKGNAME] && . /etc/default/$PKGNAME

# Load the VERBOSE setting and other rcS variables
[-f /etc/default/rcS] && . /etc/default/rcS

# Define LSB log_* functions.
# Depend on lsb-base (>= 3.0-6) to ensure that this file is present.
. /lib/lsb/init-functions

if [-z "$RUN_AT_STARTUP" -o "$RUN_AT_STARTUP" != "YES"]
then
   log_warning_msg "Not starting $PKGNAME, edit /etc/default/$PKGNAME to start it."
   exit 0
fi

if [-z "$DELUGED_USER"]
then
    log_warning_msg "Not starting $PKGNAME, DELUGED_USER not set in /etc/default/$PKGNAME."
    exit 0
fi

#
# Function that starts the daemon/service
#
do_start()
{
   # Return
   # 0 if daemon has been started
   # 1 if daemon was already running
   # 2 if daemon could not be started
   start-stop-daemon --start --background --quiet --pidfile $PIDFILE1 --exec $DAEMON1 \
      --chuid $DELUGED_USER --user $DELUGED_USER --umask $UMASK --test > /dev/null
   RETVAL1="$?"
   start-stop-daemon --start --background --quiet --pidfile $PIDFILE2 --exec $DAEMON2 \
      --chuid $DELUGED_USER --user $DELUGED_USER --umask $UMASK --test > /dev/null
   RETVAL2="$?"
   ["$RETVAL1" = "0" -a "$RETVAL2" = "0"] || return 1

   start-stop-daemon --start --background --quiet --pidfile $PIDFILE1 --make-pidfile --exec $DAEMON1 \
      --chuid $DELUGED_USER --user $DELUGED_USER --umask $UMASK -- $DAEMON1_ARGS
   RETVAL1="$?"
        sleep 2
   start-stop-daemon --start --background --quiet --pidfile $PIDFILE2 --make-pidfile --exec $DAEMON2 \
      --chuid $DELUGED_USER --user $DELUGED_USER --umask $UMASK -- $DAEMON2_ARGS
   RETVAL2="$?"
   ["$RETVAL1" = "0" -a "$RETVAL2" = "0"] || return 2
}

#
# Function that stops the daemon/service
#
do_stop()
{
   # Return
   # 0 if daemon has been stopped
   # 1 if daemon was already stopped
   # 2 if daemon could not be stopped
   # other if a failure occurred

   start-stop-daemon --stop --quiet --retry=TERM/30/KILL/5 --user $DELUGED_USER --pidfile $PIDFILE2
   RETVAL2="$?"
   start-stop-daemon --stop --quiet --retry=TERM/30/KILL/5 --user $DELUGED_USER --pidfile $PIDFILE1
   RETVAL1="$?"
   ["$RETVAL1" = "2" -o "$RETVAL2" = "2"] && return 2

   rm -f $PIDFILE1 $PIDFILE2

   ["$RETVAL1" = "0" -a "$RETVAL2" = "0"] && return 0 || return 1
}

case "$1" in
  start)
   ["$VERBOSE" != no] && log_daemon_msg "Starting $DESC" "$NAME1"
   do_start
   case "$?" in
      0|1) ["$VERBOSE" != no] && log_end_msg 0 ;;
      2) ["$VERBOSE" != no] && log_end_msg 1 ;;
   esac
   ;;
  stop)
   ["$VERBOSE" != no] && log_daemon_msg "Stopping $DESC" "$NAME1"
   do_stop
   case "$?" in
      0|1) ["$VERBOSE" != no] && log_end_msg 0 ;;
      2) ["$VERBOSE" != no] && log_end_msg 1 ;;
   esac
   ;;
  restart|force-reload)
   log_daemon_msg "Restarting $DESC" "$NAME1"
   do_stop
   case "$?" in
     0|1)
      do_start
      case "$?" in
         0) log_end_msg 0 ;;
         1) log_end_msg 1 ;; # Old process is still running
         *) log_end_msg 1 ;; # Failed to start
      esac
      ;;
     *)
        # Failed to stop
      log_end_msg 1
      ;;
   esac
   ;;
  *)
   echo "Usage: $SCRIPTNAME {start|stop|restart|force-reload}" >&2
   exit 3
   ;;
esac

:
Hit control and o
Hit enter
Hit control and x
This will save the updated file
Change the script permissions
chmod 755 /etc/init.d/deluge-daemon
Run this command so the program auto starts at boot and on reboots
update-rc.d deluge-daemon defaults
Ok now let’s start Deluge!
/etc/init.d/deluge-daemon start
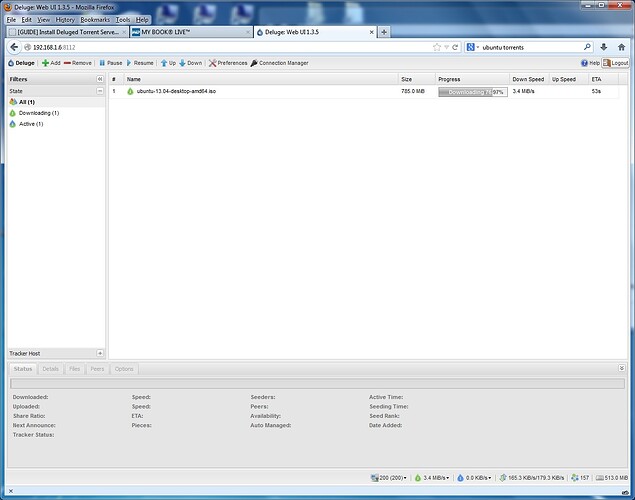
In your web-browser let’s connect to the web-ui
http://your MBL name or IP:8112
password= deluge
Connection Manager will now pop up
Select the server and hit connect
When asked, change the password and hit the Change button
Go to preferences and make any changes you need starting with download paths
Download to:
/DataVolume/shares/Public/Deluge
Click Plugins and tick the Execute box and click apply and ok
Logout (Top right corner) and then login again with your password
Go back to Preferences and you should now see Execute at the bottom of the list
Click Execute and then Add an event
Change Event to Torrent Complete
In the command box type
/usr/local/sbin/unrar.sh
Now we have to create a script
nano /usr/local/sbin/unrar.sh
And paste the following
#!/bin/bash
formats=(zip rar)
commands=([zip]="unzip -u" [rar]="unrar -o- e")
extraction_subdir='extracted'

torrentid=$1
torrentname=$2
torrentpath=$3

log()
{
    logger -t deluge-extractarchives "$@"
}

log "Torrent complete: $@"
cd "${torrentpath}"
for format in "${formats[@]}"; do
    while read file; do
        log "Extracting \"$file\""
        cd "$(dirname "$file")"
        file=$(basename "$file")
        # if extraction_subdir is not empty, extract to subdirectory
        if [[! -z "$extraction_subdir"]] ; then
            mkdir "$extraction_subdir"
            cd "$extraction_subdir"
            file="../$file"
        fi
        ${commands[$format]} "$file"
    done < <(find "$torrentpath/$torrentname" -iname "*.${format}" )
done
Hit control and o
Hit enter
Hit control and x
This will save the updated file
Now set the permissions
chmod 755 /usr/local/sbin/unrar.sh
Now we can install a blocklist by downloading the emule blocklist from here
Once you download it, extract the .dat file inside to your hard drive
Now go to the Deluged web-ui and select Preferences/Plugins/Install
Browse to the ipfilter.dat and click install
Restart Deluged (Important or the unrar script won’t work and blocklist might not be active)
/etc/init.d/deluge-daemon restart
Deluge plugins can be found at

